
Wir brauchen Oberstoff, Futterstoff, Aufbügelbare Vlieseinlage zur Verstärkung, Reißverschluss, Nähzubehör, umweltfreundlichen Kleber oder Klebestift, Schneidematte und Rollschneider sind nicht unbedingt erforderlich, aber sehr praktisch!
We Need fabric, lining fabric, non woven fusible interfacing, zipper, sewing essentials, glue or glue stick, Rotary cutter and cutting mat are very useful!

- Oberstoff und Futterstoff, Länge 70cm, Breite 36 cm
- Reißverschluss mindestens 40 cm lang
- Ripsband 2,5 cm breit, 90 cm lang
- Stoffstreifen Oberstoff 2,5 cm breit, 90 cm lang
- fabric for the bag and lining fabric 27,6 inch also fusible interfacing
- zipper 15,8 inch
- Petersham ribbon 1inch, 36 inch Long
- a Strip of the bag-fabric with the same width and length like the petersham ribbon
Unser erster Schritt ist der Zuschnitt von Stoff und Futterstoff, das Aufbügeln des Vlieselines auf den Oberstoff und das Markieren der Bruchlinie, 5,5 cm am unteren Ende des Stoffes und dann umbügeln.
Our first step is cutting the fabric, lining and facing, pressing the lining on the bag-fabric and marking a line 2 inch at the bottom-edge of our fabric and press this line .
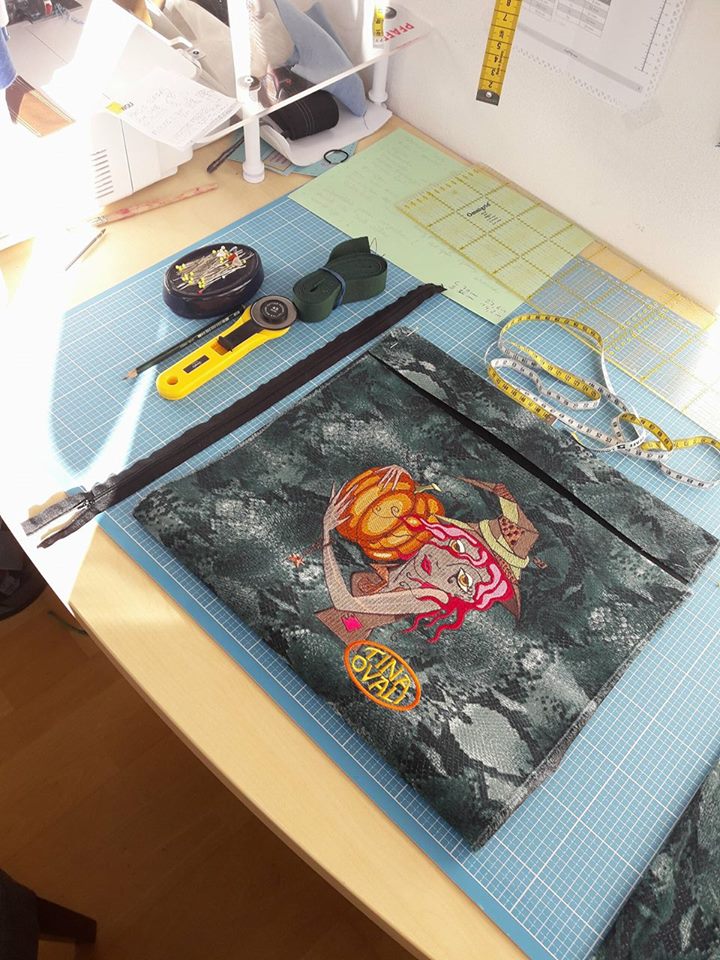 |
so wird die Tasche aussehen/this is how it looks like
Jetzt nähen wir den Reißverschluss ein, indem wir ihn zwischen Oberstoff und Futterstoff stecken, die Zähnchen auf die rechte Seite des Oberstoffes, dann den Futterstoff mit der rechten Seite drüberlegen. Mit dem Reißverschlussfuß einnähen, vorsichtig die Nähte bügeln und dann von rechts absteppen.Now we are sewing the zipper between fabric and lining, the teeth of the Zipper are on the rigt side of fabric then the right side of lining. Sew in with the Zipper foot , press carefully and then topstitch from the right side.    Jetzt wird die Tasche auf die linke Seite gedreht und festgesteckt, dass unsere markierte Linie genau die obere Kante bildet.Now we turn our bag on the left side and fix it with Pins, our marked Line is on the top of the bag. hier sehen wir unseren markierten Bug/ here is our marked line hier sehen wir unseren markierten Bug/ here is our marked line Jetzt nähen wir die Seitennähte durch alle Stoffschichten, die Ecken zurückschneiden und die Nähte versäubern. Now we sew the side seems, cut the corners with care and clean the edges with a zigzag or overlock-stitch.  Wir nähen die Ecken 2 cm ab, damit die Tasche später stabil ist.We sew the corners about 1/8 inch 
die Ecken zurückschneiden, cut the corner
 Jetzt noch der Taschenhenkel/ now the strapDas Oberstoffband und das Ripsband werden aufeinander geklebt, ein wenig antrocknen lassen, bügeln. Dann mit der Nähmaschine an den Kanten entlang einen schönen Stich nähen und zum Schluss mit dem Satinstich (Raupenstich) die Kanten versäubern. Auf diese Art bekommt man sehr stabile und schöne Taschenhenkel. Diese Henkel werden nur noch an die Tasche genäht und .......FERTIG!We glue the two straps - the fabric and the petersham together, let them dry a few minutes and press it . Sew a nice stitch of your sewing machine along the edges of the strap and at last sew a line of satin stitch along the edges. This makes your strap clean and stable! Pin the strap on your bag, sew it and the bag is.......READY!     |
Keine Kommentare:
Kommentar veröffentlichen